
Shoulder pain can make everyday activities—reaching for a shelf, getting dressed, lifting a bag, exercising, or sleeping—more difficult. Gentle movement and progressive exercise often play an important role in recovery, but there is no single routine that is right for every painful shoulder.
The most appropriate exercises depend on how your pain began, which movements are limited, your current strength, and whether you are recovering from an injury or surgery. The exercises below are general options, not a diagnosis or a universal treatment plan.
You do not need to perform all eight exercises. A physical therapist can help determine which movements fit your needs and how to progress them safely.
When to Seek Medical Care First
Get prompt medical advice before trying these exercises if:
- Your pain began after a fall, collision, or other injury.
- You cannot move your arm.
- Your shoulder looks deformed or is significantly swollen.
- You have sudden or severe pain.
- You have progressive weakness, persistent numbness, or loss of sensation.
- Your arm feels unusually hot or cold.
- You have a fever or feel unwell.
- Your symptoms are getting worse or are not beginning to improve.
Call emergency services if shoulder or arm pain occurs with chest pressure, shortness of breath, sweating, dizziness, or nausea.
How to Use These Shoulder Exercises
Start with movements that feel manageable rather than trying to complete the entire list.
- Use a comfortable range of motion.
- Move slowly and with control.
- Mild muscular effort or a gentle stretch may be reasonable.
- Stop if you experience sharp pain, increasing pain, new numbness, or a feeling of instability.
- Monitor how your shoulder responds later that day and the next morning.
- If symptoms remain noticeably worse, reduce the range, resistance, repetitions, or frequency.
- Add resistance only after you can perform the movement comfortably with good control.
The repetitions included below are starting suggestions, not prescriptions.
1. Pendulum Exercises
The pendulum is a low-effort way to introduce movement when actively raising your arm feels uncomfortable. It may be useful during the early stages of rehabilitation, depending on your injury and medical recommendations.

How to Perform It
- Place the hand of your comfortable side on a sturdy table or chair.
- Hinge forward at your hips.
- Let the affected arm hang loosely toward the floor.
- Gently shift your body weight to make the relaxed arm move forward and backward.
- If comfortable, repeat the movement side to side or in small circles.
Starting point: Perform each direction for 20–30 seconds. Complete one or two rounds.
Physical therapist’s tip: The movement should come from shifting your body, not actively swinging your shoulder. Imagine that your arm is hanging like a relaxed rope.
2. Scapular Stabilization Exercises (Prone I-Y-T Series)
The shoulder blade works with the arm during reaching, lifting, and overhead movement. This exercise introduces gentle control without forcing the shoulders into a rigid position.
Why They Work
Think of your shoulder blade as the foundation of a house. If that foundation is wobbly, anything you build on top of it—like your arm (the glenohumeral joint)—is going to be unstable too. The Prone I-Y-T series trains the muscles that anchor your scapula firmly to your rib cage. This improved stability prevents common problems like impingement, where tissues get pinched, and takes a ton of strain off the rotator cuff. For our athletes, especially those in overhead sports like swimming or baseball, this control is absolutely critical for both performance and staying off the injured list. It’s also a key part of our physical therapy programs after rotator cuff surgery, where re-establishing this control is essential for long-term success.
How to Perform It
- Sit or stand in a comfortable position.
- Allow your arms to rest naturally at your sides.
- Gently guide your shoulder blades slightly back and down.
- Keep your neck relaxed and avoid arching your lower back.
- Hold for two or three seconds.
- Release completely before repeating.
Starting point: Perform 6–10 controlled repetitions.
Physical therapist’s tip: This should be a small, relaxed movement. You do not need to squeeze the shoulder blades together as hard as possible or maintain the position throughout the day.
3. Cross-Body Shoulder Stretch
Some people benefit from improving mobility across the back of the shoulder. The cross-body stretch is easy to adjust and may be more comfortable than forcing the arm into an internally rotated sleeper-stretch position.
Why It Works
A lot of shoulder problems come down to a loss of internal rotation. When the tissues at the back of your shoulder get tight, they can actually shove the “ball” of your humerus forward in the socket. This closes down the space available for your rotator cuff tendons, leading to pinching. The sleeper stretch fights back by applying a gentle, prolonged stretch to those exact structures. This helps lengthen the posterior capsule and muscles, restoring the joint’s natural mechanics and creating more space to reduce that painful “impingement.”
How to Perform It
- Sit or stand comfortably.
- Bring the affected arm across your chest.
- Use your other hand to support the arm just above the elbow.
- Apply gentle pressure until you feel a mild stretch around the back of the shoulder.
- Keep the shoulder relaxed.
- Stop if you experience pinching in the front or top of the joint.
Starting point: Hold for 15–30 seconds and repeat two or three times.
Physical therapist’s tip: The goal is a mild stretch, not the greatest possible range. Loss of shoulder rotation can have different causes, so this exercise may not be appropriate for everyone.
4. Side-Lying External Rotation
Side-lying external rotation can strengthen the rotator cuff when the movement is comfortable. Start without weight or with very light resistance.
Why They Work
The side-lying position is what makes this exercise so powerful. By lying on your good side, you make gravity your friend—it provides the resistance, which is much better for building strength than doing the same motion standing up. This position also forces you to keep your elbow tucked in, ensuring you’re truly isolating the external rotator muscles instead of cheating with bigger muscles like your deltoids or upper back. This targeted strengthening helps the rotator cuff do its main job: keeping the head of the humerus (the “ball”) centered in the socket during movement. This reduces impingement and improves how the whole joint works. We use this for everything from post-op rotator cuff repairs to performance programs for our local throwing athletes.
How to Perform It
- Lie on your non-painful side.
- Bend the elbow of your top arm to 90 degrees.
- Place a small folded towel between the elbow and your side.
- Keep the elbow resting against the towel.
- Slowly rotate your forearm upward.
- Stop before you need to shrug, roll backward, or force the movement.
- Lower your arm slowly.
Starting point: Perform 1–2 sets of 8–12 repetitions without weight or with a very light weight.
Physical therapist’s tip: You should feel the muscles working around the back or side of the shoulder. Reduce the range or resistance if you feel a sharp pinch in the front of the joint.
5. Resistance-Band Row
A resistance-band row can build endurance in the muscles around the shoulder blade and upper back. It may support reaching and pulling activities, but it should not be presented as a universal correction for “bad posture.”
Why They Work
The genius of the band pull-apart is its simplicity and effectiveness. It directly targets the posterior deltoids, rhomboids, and middle trapezius—the exact muscles responsible for pulling your shoulder blades back and down into a healthy position. Strengthening these muscles improves your posture and scapular control, which creates more space within the shoulder joint for the rotator cuff tendons to move without getting pinched. This is one of the best exercises for shoulder pain because it attacks a root cause of the problem—poor posture—instead of just chasing the symptoms.
How to Perform It
- Secure a resistance band at approximately waist or chest height.
- Hold one end in each hand.
- Step backward until the band has light tension.
- Bend your elbows and draw them backward comfortably.
- Pause briefly without shrugging or forcefully squeezing your shoulder blades.
- Return slowly to the starting position.
Starting point: Perform 1–2 sets of 8–15 repetitions.
Physical therapist’s tip: Keep your neck and ribs relaxed. Shorten the movement or use a lighter band if the front of your shoulder becomes painful.
6. Quadruped Shoulder Taps
As you start feeling better, it’s time to challenge your shoulder stability in a more dynamic way. Quadruped shoulder taps are a fantastic mid-to-late-stage exercise that builds strength, control, and body awareness. This move forces you to stabilize your entire trunk and shoulder on one arm while the other moves, training the rotator cuff and scapular muscles to work together with your core. It’s a great exercise for re-learning the coordinated patterns you need for sports and just living your life.

Why They Work
The magic of this exercise is how it teaches dynamic stability while your hand is on the floor (a “closed-chain” position). The moment you lift one hand, your body has to instantly fire up a bunch of muscles to keep you from twisting and collapsing. The rotator cuff on your grounded shoulder works hard to keep the joint centered, while the scapular muscles work overtime to keep that shoulder blade glued to your rib cage. This makes it one of the best exercises for shoulder pain related to instability or poor coordination, improving both strength and proprioception (your joint’s sense of where it is in space).
How to Perform Quadruped Shoulder Taps Correctly
Slow and steady wins the race here. Perfect form is way more important than speed.
- Setup: Get on your hands and knees in a “tabletop” position. Your hands should be directly under your shoulders and your knees directly under your hips. Your back should be flat.
- The Motion: Brace your core like someone’s about to push you over. Slowly lift one hand off the floor and bring it across your body to gently tap the opposite shoulder. The key is to keep your torso and hips completely still; don’t let them rotate or shift.
- Duration and Frequency: Place your hand back down with control and repeat on the other side. Aim for 2-3 sets of 10-12 total taps (5-6 per side). Perform this 3-4 times per week as part of your strengthening routine.
Physical Therapist’s Insight: Imagine you have a full glass of water sitting on your lower back. Your goal is to get through all the reps without spilling a single drop. This cue forces you to engage your deep core muscles and stops the common cheat of rotating your hips and trunk. The work should be felt in the stabilizing shoulder and your abs, not your lower back.
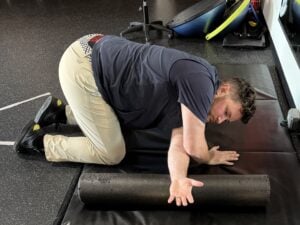
7. Serratus Forearm Wall Slide
Unlike the previous mobility exercise, this wall-slide variation focuses on shoulder-blade control and serratus anterior activation. It should be introduced only when pressing the forearms into the wall feels comfortable.
Why They Work
The beauty of the wall slide is how it isolates and improves shoulder movement in a safe, low-risk way. The wall is your coach; it prevents you from making common mistakes like arching your low back or shrugging your shoulders to get your arms higher. This forces your shoulder joint and shoulder blade to do the work properly. This guided movement gently stretches tight muscles like the lats and pecs while waking up key stabilizers like the serratus anterior, which is essential for your shoulder blade to rotate upward correctly. It’s a foundational move for everyone from desk jockeys to pro athletes.
How to Perform It
- Stand facing a wall.
- Place both forearms against the wall with your elbows bent.
- Apply gentle pressure through your forearms.
- Slowly slide your forearms upward.
- Allow your shoulder blades to move naturally around your rib cage.
- Stop before you shrug excessively, arch your lower back, or experience pain.
- Return slowly to the starting position.
Starting point: Perform 1–2 sets of 6–10 repetitions without a resistance band.
Physical therapist’s tip: Do not force your shoulder blades down while your arms move upward. The shoulder blades should rotate naturally during overhead movement.
8. Trigger Point Dry Needling and Soft Tissue Mobilization
Okay, so this isn’t an “exercise” you do at home, but it’s a powerful clinical tool that can make all the best exercises for shoulder pain infinitely more effective. Trigger Point Dry Needling (TPDN), combined with hands-on soft tissue work, is an advanced technique we use to break the cycle of pain. A physical therapist inserts fine, sterile needles into myofascial trigger points—those stubborn “knots” in your muscles that are often the hidden source of chronic pain and stiffness. Pairing this with manual massage breaks down adhesions and resets the muscle, creating a golden window of opportunity for you to move and strengthen without pain.

Why They Work
Dry needling gets right to the source of muscular pain. When a needle goes into a trigger point, it causes a “local twitch response”—an involuntary muscle contraction. This response is a good thing! It helps release the knot, calms the muscle down, and improves blood flow to the area. It’s like hitting a reset button on a muscle that’s been stuck in a pain-spasm cycle. When those tight, angry muscles around your shoulder blade and rotator cuff finally let go, you can actually perform your rehab exercises correctly and see much faster, more lasting results. You can learn more about how our specialists use this technique in our guide to Trigger Point Dry Needling at Joint Ventures.
How to Prepare and What to Expect
Integrating dry needling into your care plan is a team effort between you and your physical therapist.
- Communication is Key: Before your session, please tell us if you have any anxiety about needles. It’s incredibly common, and our clinicians are experts at making patients feel comfortable and can adjust the treatment. We’re here to work with you.
- The Sensation: You might feel a tiny prick when the needle goes in, followed by a deep ache or the twitch response when the trigger point is found. This feeling is temporary and is the sign that the treatment is working.
- Post-Treatment Care: It’s normal to feel some muscle soreness for 24-48 hours, like you had a really tough workout. Your therapist will show you how to use ice or heat and will give you specific stretches to do right after your session, when your muscles are most ready to change.
Physical Therapist’s Insight: We often see patients who’ve been stuck for months or years with shoulder pain that just wasn’t getting better with exercise alone. Dry needling can be the key that finally unlocks their progress. By releasing a chronically tight lat or infraspinatus muscle, we can finally restore the overhead motion they need to actually get stronger. Think of it as tilling the soil before planting seeds; we create the best possible environment for your exercises to grow into real results.
8-Quadruped Weight Shift and Shoulder-Tap Progression
Weight-bearing exercises can help improve shoulder control. However, a full quadruped shoulder tap is more demanding than it appears. Begin with weight shifts and progress only when you can keep the shoulder comfortable and your trunk steady.
[IMAGE: A person in a true hands-and-knees position, with hands under the shoulders and knees under the hips. For the advanced image, one hand taps the opposite shoulder while the trunk remains level. Do not use a standing resistance-band image.]
Level 1: Quadruped Weight Shift
- Begin on your hands and knees.
- Position your hands under your shoulders and your knees under your hips.
- Keep your elbows soft.
- Press gently through both hands.
- Shift a small amount of weight forward and backward.
- If comfortable, shift gently from side to side.
Starting point: Continue for 20–30 seconds.
Level 2: Quadruped Shoulder Tap
- Begin in the same hands-and-knees position.
- Widen your knees slightly for additional stability.
- Shift your weight onto one hand.
- Lift the other hand and gently tap the opposite shoulder.
- Return your hand to the floor.
- Alternate sides while keeping your trunk as level as possible.
Starting point: Perform 4–8 repetitions on each side.
Physical therapist’s tip: If your trunk rotates significantly or the supporting shoulder feels painful or unstable, return to the weight-shift variation.
Which Shoulder Exercise Should You Choose?
| Your goal | Possible starting exercise | Possible progression |
|---|---|---|
| Introduce gentle movement | Pendulum | Wall-assisted shoulder flexion |
| Improve shoulder-blade awareness | Supported shoulder-blade control | Serratus forearm wall slide |
| Improve mobility across the back of the shoulder | Cross-body stretch | Individualized mobility exercise |
| Strengthen the rotator cuff | Side-lying external rotation without weight | Gradually add resistance |
| Build upper-back endurance | Light resistance-band row | Increase repetitions or resistance |
| Improve weight-bearing control | Quadruped weight shift | Quadruped shoulder tap |
This table is a menu, not a sequence that everyone must complete. The best exercise is one that addresses your specific limitation, can be performed with good control, and can be progressed without a sustained increase in symptoms.
Is Dry Needling an Exercise for Shoulder Pain?
Trigger point dry needling is not an exercise and should never be presented as a self-treatment. It is an optional clinical intervention performed by a properly trained and licensed professional where permitted by law.
Research suggests that dry needling may provide short-term improvement for some people with musculoskeletal shoulder pain. However, results vary, and it is not clearly superior to other conservative treatments in every study.
Dry needling should not be described as “breaking down adhesions,” “resetting” a muscle, or as something everyone with shoulder pain needs. When used, it should be considered an addition to an active rehabilitation plan—not a replacement for progressive movement, strengthening, and activity modification.
Hands-on treatment may also help some patients manage symptoms or regain movement. Its role should be based on a clinical assessment, patient preference, and response to treatment.
How to Progress Your Shoulder Exercises
Improvement is rarely about finding one perfect exercise. It usually comes from matching activity to your current capacity and gradually increasing the challenge.
- Choose one mobility exercise and one strength or control exercise that feel manageable.
- Begin with a comfortable range and light effort.
- Monitor whether daily activities such as reaching, dressing, lifting, working, or sleeping become easier.
- Progress one variable at a time: range, repetitions, resistance, or task difficulty.
- Reduce the difficulty if your symptoms remain noticeably worse afterward.
- Schedule an assessment if you cannot find a comfortable starting point or your symptoms are not improving.
Get a Plan Designed for Your Shoulder
Shoulder pain can come from different tissues and movement limitations. Similar symptoms do not always require the same treatment.
At Joint Ventures Physical Therapy, we assess your mobility, strength, function, goals, and symptom behavior before developing a personalized treatment plan.