
That clicking, popping, or just plain aching jaw is more than just an annoyance, huh? We know. It can disrupt everything from enjoying a good meal to getting through a workday without a tension headache.
Effective TMJ pain relief exercises aren’t just random movements; they’re targeted, gentle, and designed to strengthen your jaw and improve mobility. We're here to walk you through how to get started safely right at home.
Understanding That Clicking and Aching Jaw

If you're struggling with jaw pain, you're in good company. Here in our Boston clinics, we see folks every single day whose lives are impacted by this nagging issue.
Your temporomandibular joint (TMJ) is that small but complex hinge connecting your jawbone to your skull. When the joint and the muscles around it get out of sync, you end up with what we call temporomandibular dysfunction, or TMD.
Think of it like a door hinge that’s just a little off. It might creak, get stuck, or not open smoothly. For your jaw, that dysfunction often shows up as:
- A clicking or popping sound when you open your mouth
- A dull, aching pain in front of your ear that can spread to your face, neck, or shoulders
- Pain or difficulty while trying to chew
- A feeling that your jaw is "stuck" or "locked"
Common Causes of TMJ Pain
It’s almost never one single thing that causes the TMJ to act up. Usually, it’s a combination of factors that have been building up over time. The most common culprits we see are muscle tension from stress, habitual teeth clenching or grinding (what we call bruxism), and even poor posture.
It's surprising just how many people are walking around with TMJ issues—you can learn more about how surprisingly common TMJ is in Boston and what contributes to it.
We often tell our patients: “Your head is like a bowling ball sitting on top of your spine. If it’s tilted forward all day while you look at a screen, it puts a ton of strain on your neck and jaw muscles.” This forward head posture is a huge contributor to TMJ pain, and we see it all the time.
A Quick Symptom Self-Check
Before you jump into exercises, it helps to play detective and get to know your jaw's specific patterns. These simple checks can give you clues about what’s going on, which helps you focus your efforts later. Try these movements gently while looking in a mirror.
Quick TMJ Symptom Self-Check
Use this simple table to identify and understand your specific TMJ symptoms at home.
| Symptom to Check | How to Perform the Check | What This Might Indicate |
|---|---|---|
| Jaw Clicking or Popping | Open and close your mouth slowly. Note if you hear a pop or click, and if it happens early or late in the movement. | Clicking can indicate that the small disc inside your jaw joint is moving out of its normal position. |
| Lateral (Side-to-Side) Movement | Gently glide your lower jaw to the right, then to the left. Look for any differences in how far you can move each way. | Limited movement to one side can point to muscle tightness or a joint restriction on the opposite side. |
| Jaw Deviation | Watch your chin in the mirror as you slowly open your mouth wide. Does your chin veer off to one side? | A "C" or "S" curve during opening often suggests a muscle imbalance or an issue with how the joint is tracking. |
Remember to do each check slowly and without pushing into any sharp pain. These observations are a great starting point for understanding what's really happening with your jaw.
The Foundation of Relief: Posture and Jaw Rest
Before we jump into specific exercises for your jaw, we have to talk about the foundation. It’s something we see constantly in the clinic: a patient comes in for jaw pain, but the problem actually starts in their neck and shoulders.
Think about it. That classic "tech neck"—head forward, shoulders rounded from hours staring at a screen—puts a huge amount of strain on the muscles connecting to your jaw. When those muscles are constantly tense, they pull on the temporomandibular joint, leading to the pain, clicking, and tightness you’re feeling.
The good news? We can start to fix this right now with a few simple, conscious changes to your daily habits.
Mastering Your Posture
Correcting your posture isn’t about being stiff or uncomfortable. It’s about finding a more efficient, balanced position that takes stress off your muscles. A small tweak can make a massive difference, whether you're at your desk in the Back Bay or sitting on the T.
Try this right now:
- Sit Tall: Imagine a string gently pulling the crown of your head toward the ceiling. Let your shoulders relax down and away from your ears.
- Do a Chin Tuck: Gently pull your chin straight back, as if you’re trying to make a double chin. Don't tilt your head down; the movement should be straight back. You’ll feel a nice, gentle stretch at the base of your skull. Hold for 3-5 seconds and release.
- Align Your Ears: Your ears should be positioned roughly over your shoulders. Most of us let our head drift forward, so this might feel a little strange at first, but stick with it.
These small adjustments, when you do them consistently, help retrain your muscles to hold your head in a healthier spot.
As we often remind our patients, "For every inch your head moves forward, it adds about 10 pounds of pressure on your spine and neck muscles." That's a lot of extra work for muscles that are already trying to manage your jaw!
Finding Your Jaw Rest Position
Just as important as your body posture is your jaw’s posture. So many of us with TMJ pain clench or hold tension in our jaw without even knowing it.
The goal is to teach your jaw what it feels like to be completely relaxed. This is what we call the jaw rest position, and it should become your new default setting.
Here’s how you find it:
- Place the tip of your tongue gently on the roof of your mouth, right behind your top front teeth.
- Let your teeth come slightly apart. They shouldn't be touching at all.
- Allow your lips to rest together without pressing them shut.
Your jaw muscles should now feel relaxed and disengaged. Easy, right?
Try to check in with yourself and return to this position whenever you catch yourself clenching—like when you're concentrating on a work project, stuck in traffic on the Pike, or feeling stressed out. This simple habit gives your overworked jaw muscles a much-needed break throughout the day, creating the perfect environment for the exercises that follow to actually work.
Gentle Jaw Stretches and Mobility Exercises
Okay, now that you've addressed your posture and started giving your jaw muscles a break, we can begin reintroducing gentle movement. This isn't about forcing the joint; it's about coaxing it back to a healthier, more comfortable range of motion.
These are the exact foundational exercises we start our patients with right here in our Boston clinics. They're designed to be safe and controlled, but the real key is moving slowly and, most importantly, listening to your body.
The process is simple: build a solid postural foundation, give the jaw a chance to rest, and then begin gentle, pain-free movement.
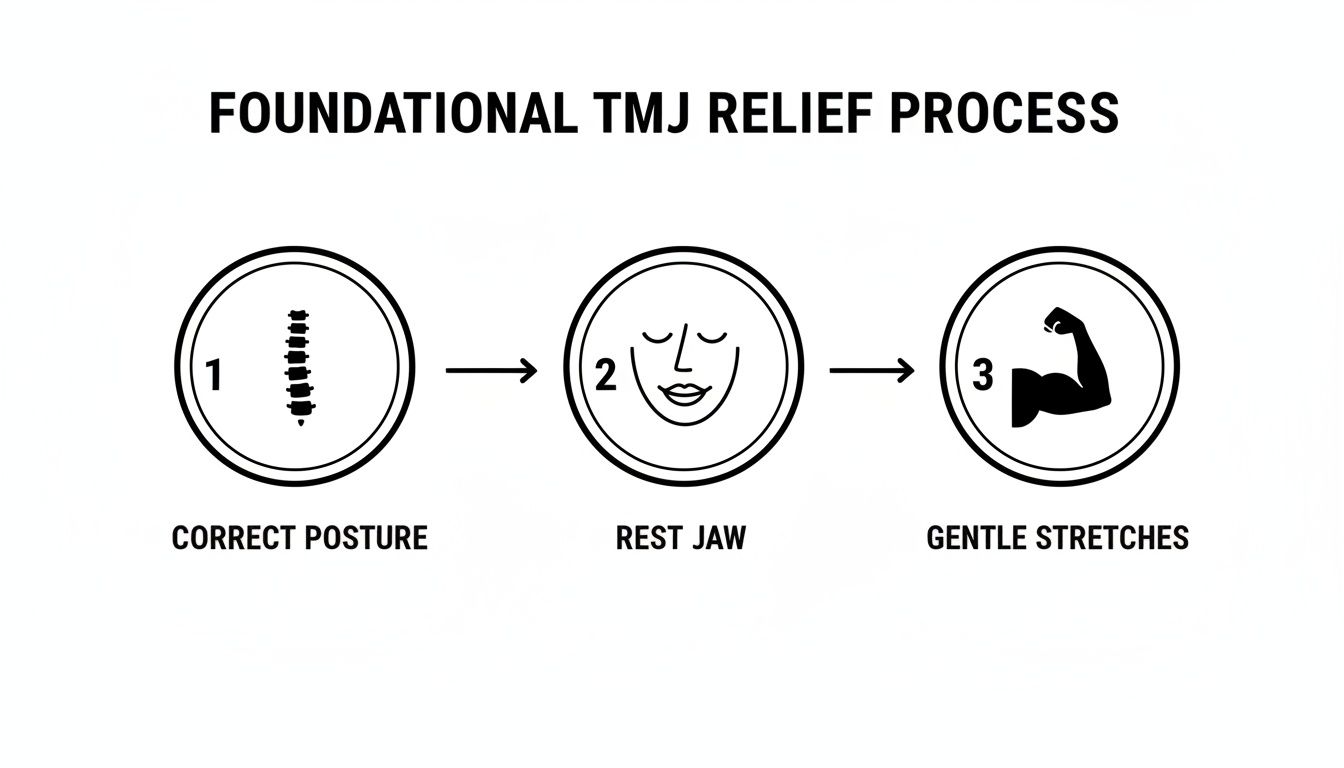
Starting with posture and rest creates the ideal environment for these mobility exercises to actually work.
The Golden Rule of Stretching Your Jaw
Before you even think about starting, let's establish the single most important rule we tell every single patient: Never push through sharp pain.
A productive stretch should feel like a mild pull or a release of tension. It should not be a sharp, stabbing, or electric sensation. If you feel anything like that, you need to stop immediately and back off. Your body’s feedback is your best guide.
Some days you'll have more movement, and some days you'll have less. That’s perfectly normal. When it comes to the jaw, consistency always wins over intensity.
At the clinic, we use a simple "stoplight" analogy. A gentle, productive stretch is a green light. A bit of discomfort or muscle soreness is a yellow light—proceed with caution. Sharp pain is a red light—stop what you're doing.
Foundational Mobility Exercises
Let’s begin with some basic movements to gently improve your jaw's mobility. The goal is to perform 5-6 slow repetitions of each exercise, a couple of times per day.
1. The Relaxed Jaw Opener
This first one is all about controlled opening and closing without letting your jaw muscles get tense. It’s a fantastic way to warm up the joint.
- Start in that jaw rest position: tongue resting on the roof of your mouth, teeth slightly apart, lips gently together.
- Keeping your tongue on the roof of your mouth, slowly lower your bottom jaw as far as you can without pain or letting your tongue peel off.
- Hold for just 2-3 seconds, then slowly return to the start. The tongue acts as an anchor, helping the joint move more smoothly.
2. Side-to-Side Glides
This exercise helps with the lateral, or side-to-side, motion of your jaw. It’s especially helpful if you noticed one side felt tighter than the other during your self-check.
- Sit or stand up straight, shoulders back and relaxed.
- Slowly glide your lower jaw to the right, hold for a moment, and then return to the center.
- Repeat to the left. Try to make the movement smooth and even, not jerky.
Modifying for Jaw Deviation
Did your jaw veer off to one side when you opened it? This is incredibly common. We call it a deviation, and it usually points to a muscle imbalance.
For instance, if your jaw pulls to the right, it often means the muscles on the left are tight, or the joint mechanics on the right side are restricted. Here's how to gently correct for that.
- Use a Mirror: Do the Relaxed Jaw Opener in front of a mirror so you can see the deviation.
- Give Gentle Guidance: Place your fingers on the side your chin deviates toward. As you slowly open, use your fingers to provide a very light cue, encouraging your jaw to track in a straight line.
- Don't Force It: This is a subtle cue to retrain the movement pattern, not a forceful correction to push the jaw into place.
Over time, this helps re-educate the muscles to fire more symmetrically. This leads to a smoother opening and closing pattern and, ultimately, less pain and clicking.
Think of these TMJ exercises as the starting point on your journey. They focus on one thing: restoring normal, pain-free movement. Once your mobility improves and your pain subsides, we can then progress to building strength for long-term stability.
Building Jaw Strength for Long-Term Stability

So far, we’ve laid a solid foundation with posture work and started to get your jaw moving better with some gentle stretches. Those are fantastic first steps for getting some immediate TMJ pain relief.
Now it's time to shift our focus from flexibility to long-term stability.
Stretching is great for making things feel better today, but strengthening is what keeps the pain from coming back next month. Think of it this way: stretching gets the joint moving, but strengthening builds the right support system around it. This is your key to reducing how often flare-ups happen and how bad they are when they do.
To do this, we’re going to use isometric exercises. This is a technique where you create muscle tension without actually moving the joint. It’s the safest and most effective way to build strength when a joint is sensitive.
Why Isometrics Are Perfect for TMJ
Isometric exercises are our go-to for TMJ strengthening because they are incredibly controlled. You're the one applying the resistance with your own hand, so you can make sure it’s always gentle and never painful.
Because there’s no actual movement, there’s no risk of pushing the joint into a painful range or causing that dreaded click or pop.
The goal here is simple: wake up the muscles that are supposed to support the jaw and build up their endurance. Stronger muscles can handle the daily stress of chewing and talking, which takes the load off the joint itself. We know from research that gentle, consistent strengthening can significantly reduce pain and improve function for people with TMD.
We always tell our patients, "This isn't about becoming a champion jaw-wrestler. It's about teaching the right muscles to do their job, so the wrong ones can finally relax." It's about control and stability, not raw power.
Your Isometric Exercise Routine
Before you start, find a comfortable seat and get your posture set—head back over your shoulders. And remember our "stoplight" rule: a feeling of muscle engagement is a green light, but any sharp pain is a red light. If you feel pain, stop immediately.
For each of these, you’ll gently apply pressure with your hand. Your jaw’s job is simply to resist that pressure, holding its position without moving.
1. Resisted Opening
This exercise strengthens the muscles that help control how you open your mouth.
- Place your fist or two fingers under your chin.
- Start to slowly open your mouth, but use your hand to provide gentle upward resistance.
- Don’t let your jaw actually move. Just hold that contraction for 5-6 seconds, then relax.
2. Resisted Closing
This works the powerful closing muscles, teaching them to engage in a more controlled, less aggressive way.
- Place your thumb under your chin and your index finger on the ridge between your lower lip and chin.
- Gently grip your chin and try to close your teeth together, but use your hand to resist the movement.
- Again, your jaw shouldn't move. Hold this gentle contraction for 5-6 seconds before relaxing.
3. Resisted Side-to-Side Movement
This one is crucial for balancing out the muscles on both sides of your face.
- For the Right Side: Place your hand on the right side of your jaw. Gently try to move your jaw to the right, using your hand to block the movement. Hold for 5-6 seconds.
- For the Left Side: Switch hands and repeat on the left side, pushing your jaw into your left hand.
How to Progress Your TMJ Pain Relief Exercises
The key to getting lasting results is following a clear, progressive plan. You need to challenge your muscles just enough over time, but not so much that you cause a setback.
Here's the exact plan we give our patients at our Boston clinics:
| Phase | Duration | Instructions | Goal |
|---|---|---|---|
| Phase 1: Activation | Week 1-2 | Perform each exercise for a 5-second hold. Complete 3-5 repetitions of each, once per day. | To wake up the muscles and establish a pain-free baseline. |
| Phase 2: Building Endurance | Week 3-4 | Increase the hold time to 7-10 seconds. Keep the repetitions at 3-5 per exercise, once per day. | To improve the muscles' ability to hold a contraction for longer. |
| Phase 3: Maintenance | Ongoing | Perform the exercises with a 10-second hold for 5 repetitions, 3-4 days per week. | To maintain strength and stability for long-term jaw health. |
This gradual progression is everything. It allows your muscles and your joint to adapt safely. Trust us, rushing the process is the fastest way to irritate your TMJ. By following this plan, you empower yourself to build a healthy, resilient, and pain-free jaw.
How to Manage Flare-Ups and When to See a PT
Even with the best exercise routine, recovery from TMJ pain isn’t always a straight line. You might have a stressful week, sleep poorly one night, or even eat a chewy piece of bread, and suddenly your jaw pain spikes.
We call these flare-ups, and they’re a totally normal part of the process. Don’t panic. Having a game plan for these tougher days is just as crucial as the exercises themselves. Think of it as your immediate action plan to calm things down and get back on track.
Your At-Home Action Plan for Flare-Ups
When your jaw starts aching, the natural tendency is to try and push through it. We're here to tell you to do the exact opposite. The real goal is to reduce inflammation and give those overworked muscles and that irritated joint a much-needed break.
These are the same simple, effective strategies we give our own patients for managing pain spikes at home.
Heat or Ice, The Right Way: For that dull, muscular ache that feels deep in your cheek, moist heat is your best friend. A warm compress held against the side of your face for 10-15 minutes can do wonders to relax tense muscles. If the pain feels sharp, inflammatory, or you notice any swelling, switch to an ice pack wrapped in a thin towel for 10 minutes to help reduce that inflammation.
Gentle Self-Massage: You can give yourself immediate relief from tight jaw muscles. Just place your fingertips on the sore spots along your jawline and cheek. Apply gentle but firm pressure and massage in slow, circular motions. The key word here is gentle—this shouldn't cause any sharp pain.
Go on a Soft Food Diet: This one is incredibly simple but so powerful. For a day or two, just give your jaw a vacation from hard work. Swap out anything crunchy, chewy, or tough for things like smoothies, yogurt, soups, and mashed potatoes.
Knowing When At-Home Care Isn't Enough
While these home strategies are great for handling minor flare-ups, it's critical to recognize when you need to call in a professional. At-home exercises are a fantastic tool, but they can't fix everything. Some symptoms are red flags, signaling a bigger issue that needs a proper evaluation.
We always tell our patients: "Your body is giving you signals. Mild soreness is one thing, but sharp, worsening, or disabling pain is a signal you need to listen to. It's time to let a professional take a look under the hood."
You should stop your exercises and seek professional help if you experience any of the following:
- Severe or Worsening Pain: If your pain shifts from a manageable ache to a severe, constant pain that doesn't get better with rest or ice.
- Jaw Locking: This is a big one. If your jaw gets stuck in either an open or closed position and you can't move it.
- New or Sudden Onset of Loud Clicking: Especially if that click is now paired with significant pain where there wasn't any before.
- Pain that Spreads: If you start noticing new numbness, tingling, or pain radiating into your ear, down your neck, or into your arm.
These symptoms suggest the problem may go beyond simple muscle tension. A physical therapist can perform a detailed assessment to figure out exactly what’s going on, whether it's a disc issue, joint inflammation, or something else entirely. Based on that evaluation, we can build a truly personalized plan.
In the clinic, we have access to treatments that go far beyond what you can do at home. For instance, skilled manual therapy lets us gently mobilize the joint and release deep muscle restrictions that self-massage just can't reach. We can also use treatments like trigger point dry needling to target those stubborn knots. To learn more about how we can help, you can explore our approach to TMJ physical therapy in Boston.
When exploring other strategies for severe TMJ pain, you might come across medical interventions. For a look at one such option, this is a helpful guide on Botox for Jaw Clenching and Relief. A qualified expert can help you figure out if this is the right path for your specific situation.
The bottom line is, you don't have to navigate this alone. A targeted exercise program is a huge step forward, but knowing when to ask for help is just as important for your long-term success.
Answering Your Top Questions About TMJ Exercises
We get it—starting a new exercise routine for something as sensitive as your jaw can feel uncertain. In our Boston clinics, we hear the same great questions every day from people trying to find relief from jaw pain.
Let's clear up some of the most common concerns. Getting these answers straight will help you feel more confident as you start using these TMJ pain relief exercises and get on the path to feeling better.
How Often Should I Perform These Exercises?
This is the first question almost everyone asks. Our answer is always the same: consistency is much more important than intensity. Think of this as a small daily habit, not a huge workout.
For the gentle mobility and stretching exercises, we recommend doing them in one or two short sessions each day. Just aim for about 5-10 slow, controlled repetitions of each movement. It should only take a few minutes out of your day.
When it comes to the isometric strengthening exercises, you can do them a bit less often. Once your muscles are comfortable with the movements, shooting for 3-4 times per week is a great target for building and maintaining jaw stability.
We always tell our patients, “A little bit every day is far better than overdoing it once and triggering a flare-up.” Your body will tell you what it needs. If pain increases, that’s your signal to back off. You can always do a little more tomorrow.
Could These Exercises Make My Jaw Pain Worse?
That’s a fair question. The honest answer is yes, it's possible—but only if you do them incorrectly or far too aggressively.
The key is that every exercise in this guide is designed to be gentle and controlled. The most important rule is to never push through sharp pain. If your symptoms are getting worse, that’s a clear sign to stop and reassess what you're doing.
If you’re following the instructions and your pain still increases, it usually points to one of a few things:
- You might be pushing just a little too hard without realizing it.
- The specific exercises you’re doing may not be targeting the true source of your TMJ issue.
- There could be an underlying joint problem that really needs a professional look before you start any program.
This is exactly where seeing a physical therapist makes all the difference. We can pinpoint the root cause and ensure your exercise plan is the right one for you.
How Long Does It Take to Feel Relief?
Everyone wants to know this, and the truth is, it’s different for every single person. How quickly you feel better depends on factors like how long you've had the pain, what’s causing it, and how consistent you are with your exercises.
Some of our patients in the clinic notice a real drop in pain and better jaw motion within just one or two weeks of doing these exercises consistently. It's a great feeling when they come back and tell us they can finally yawn without wincing!
For others, especially if the TMJ issue is more chronic or complex, it might take a month or more to see significant, lasting change. The key is to be patient with yourself and trust the process.
Think of it this way: it likely took months, or even years, for these muscle imbalances to develop. It's going to take some time to gently retrain those muscles and improve your joint mechanics. This is a gradual process aimed at long-term relief, not an overnight fix.
Is This Guide a Substitute for Seeing a PT?
No. While this guide is a fantastic starting point and a great educational tool, it is not a substitute for a one-on-one evaluation with a physical therapist. Think of this guide as excellent general advice, while PT is completely personalized care.
When you come into one of our clinics, we perform a detailed evaluation to diagnose the specific source of your TMJ pain. Is it muscular? The joint itself? Is it actually referred from your neck? The answer to that question changes the entire treatment plan.
Based on that diagnosis, we can:
- Use hands-on manual therapy techniques to release deep muscle knots and improve joint mobility in ways you can't do on your own.
- Build a stretching and strengthening program that is designed specifically for you.
- Adapt and progress your plan week by week as you improve, giving you the safest and fastest path to recovery.
A guide can give you a map, but a physical therapist acts as your personal guide—helping you navigate the tricky spots to get you to your destination safely and more efficiently.
At Joint Ventures Physical Therapy, we're here to be that guide for you. If you're tired of guessing and want a clear, personalized plan to resolve your jaw pain for good, we're ready to help. Schedule an evaluation with one of our expert TMJ specialists at any of our Greater Boston locations and let's get you on the path to relief. Visit us at https://jointventurespt.com to learn more.