
When it comes to the most effective knee injury recovery exercises, it’s all about matching the right movement to your current stage of healing. We always start with gentle motion to get swelling down and then, over time, progress toward more targeted strengthening.
Think of it as a journey. You’ll start with simple quad sets and heel slides before eventually moving to more complex things like mini-squats and balance work. The most important rule? Listen to your body and never push into sharp pain.
Your Comeback Starts Now: A Guide to Knee Recovery
That sudden twinge—or the persistent ache that just won’t quit—can feel like a massive setback. It stops you from your morning run, from playing with your kids, or even just walking down the stairs without pain. We’ve seen it countless times in our clinics, and we've helped guide people through this exact journey. You’re in the right place to start moving safely and confidently again.
This isn’t just a list of random exercises; it’s a proven roadmap. We’ll kick things off with the absolute essentials: understanding your injury and taking the immediate steps to manage that initial pain and swelling.
Setting the Stage for Success
Consider this your friendly, expert guide in your corner. We’ll explain why rest and gentle motion are your best friends in the very beginning. This early phase sets the stage for a recovery that’s not just about getting back to normal, but about building a stronger, more resilient knee for the long haul.
This simple flowchart lays out the initial game plan for knee recovery, starting with assessment and moving through the first critical phases of rest and motion.
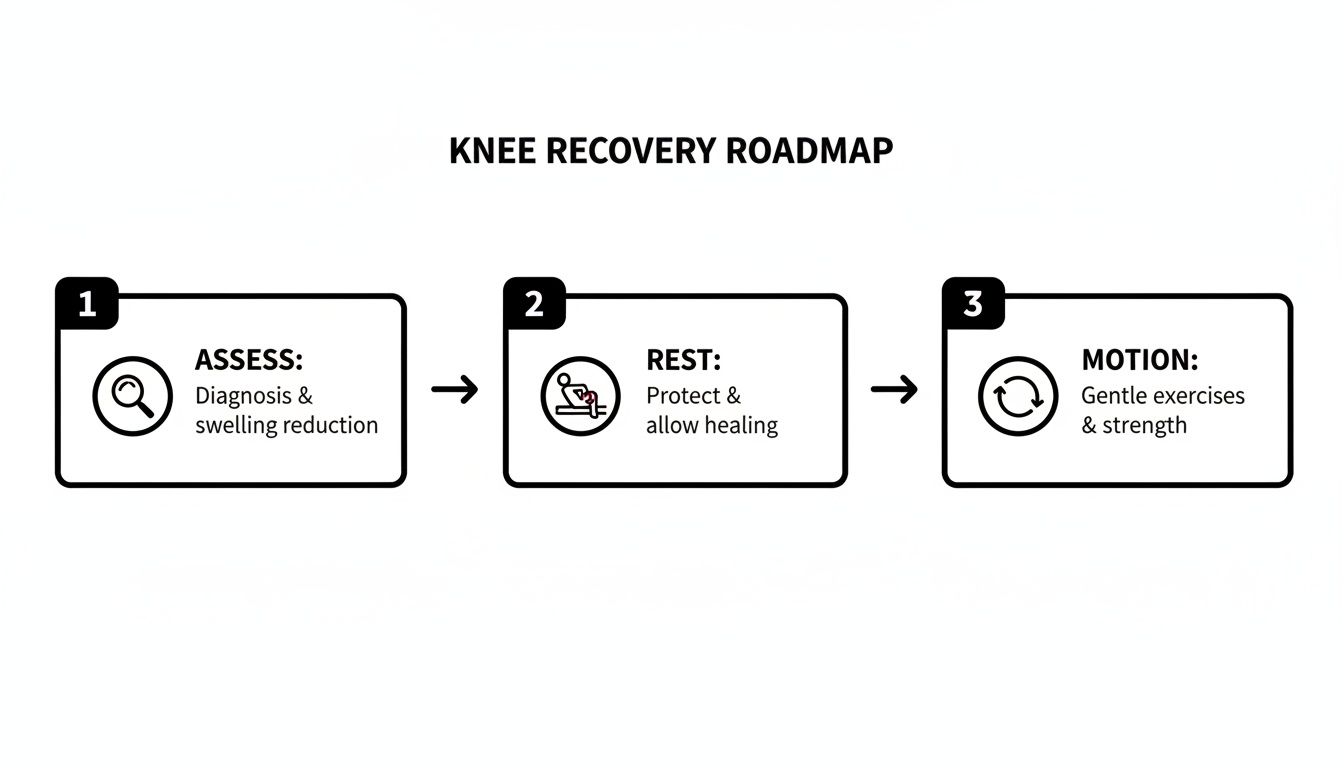
This visual really drives home a key point: a successful comeback isn’t about jumping straight into hard exercises. It’s a thoughtful, deliberate process.
To really get the most out of your rehab, it helps to understand how to recover faster by looking at the whole picture—nutrition, sleep, and even your mental game all play a huge role. These elements support the physical work you're about to put in.
The most common mistake we see is people either doing way too much too soon or doing nothing at all. Both can completely stall your progress. The sweet spot is consistent, gentle movement within a pain-free range.
Your body is designed to heal, but it needs the right signals from you to do it effectively. The initial goals are pretty straightforward:
- Calm things down: The first priority is always to reduce the initial pain and swelling that are limiting your knee's function.
- Restore basic movement: We need to gently encourage the knee to bend and straighten. This prevents stiffness from setting in, which can be a huge hurdle later on.
- Activate key muscles: It’s time to wake up the muscles that support the knee (like your quads) without actually straining the joint itself.
This foundation is what makes all the later strengthening work possible. Trying to build strength on an inflamed, stiff joint is like building a house on a shaky foundation—it just doesn't work. Let’s get you started on the right foot.
The First Phase: Protecting Your Knee and Restoring Motion
Right after a knee injury—whether from a sudden twist on the court or planned surgery—your body’s first move is to send in the inflammation crew. This is a totally normal and necessary part of healing, but our first job is to get it under control.
This initial phase is all about protecting the joint while gently reintroducing movement. Think of it less as a “workout” and more as a quiet conversation with your knee, reminding it of its basic jobs. We’re not building strength yet. That comes later. Right now, the goals are simple: calm the pain, reduce the swelling, and stop stiffness from setting in and derailing your recovery.
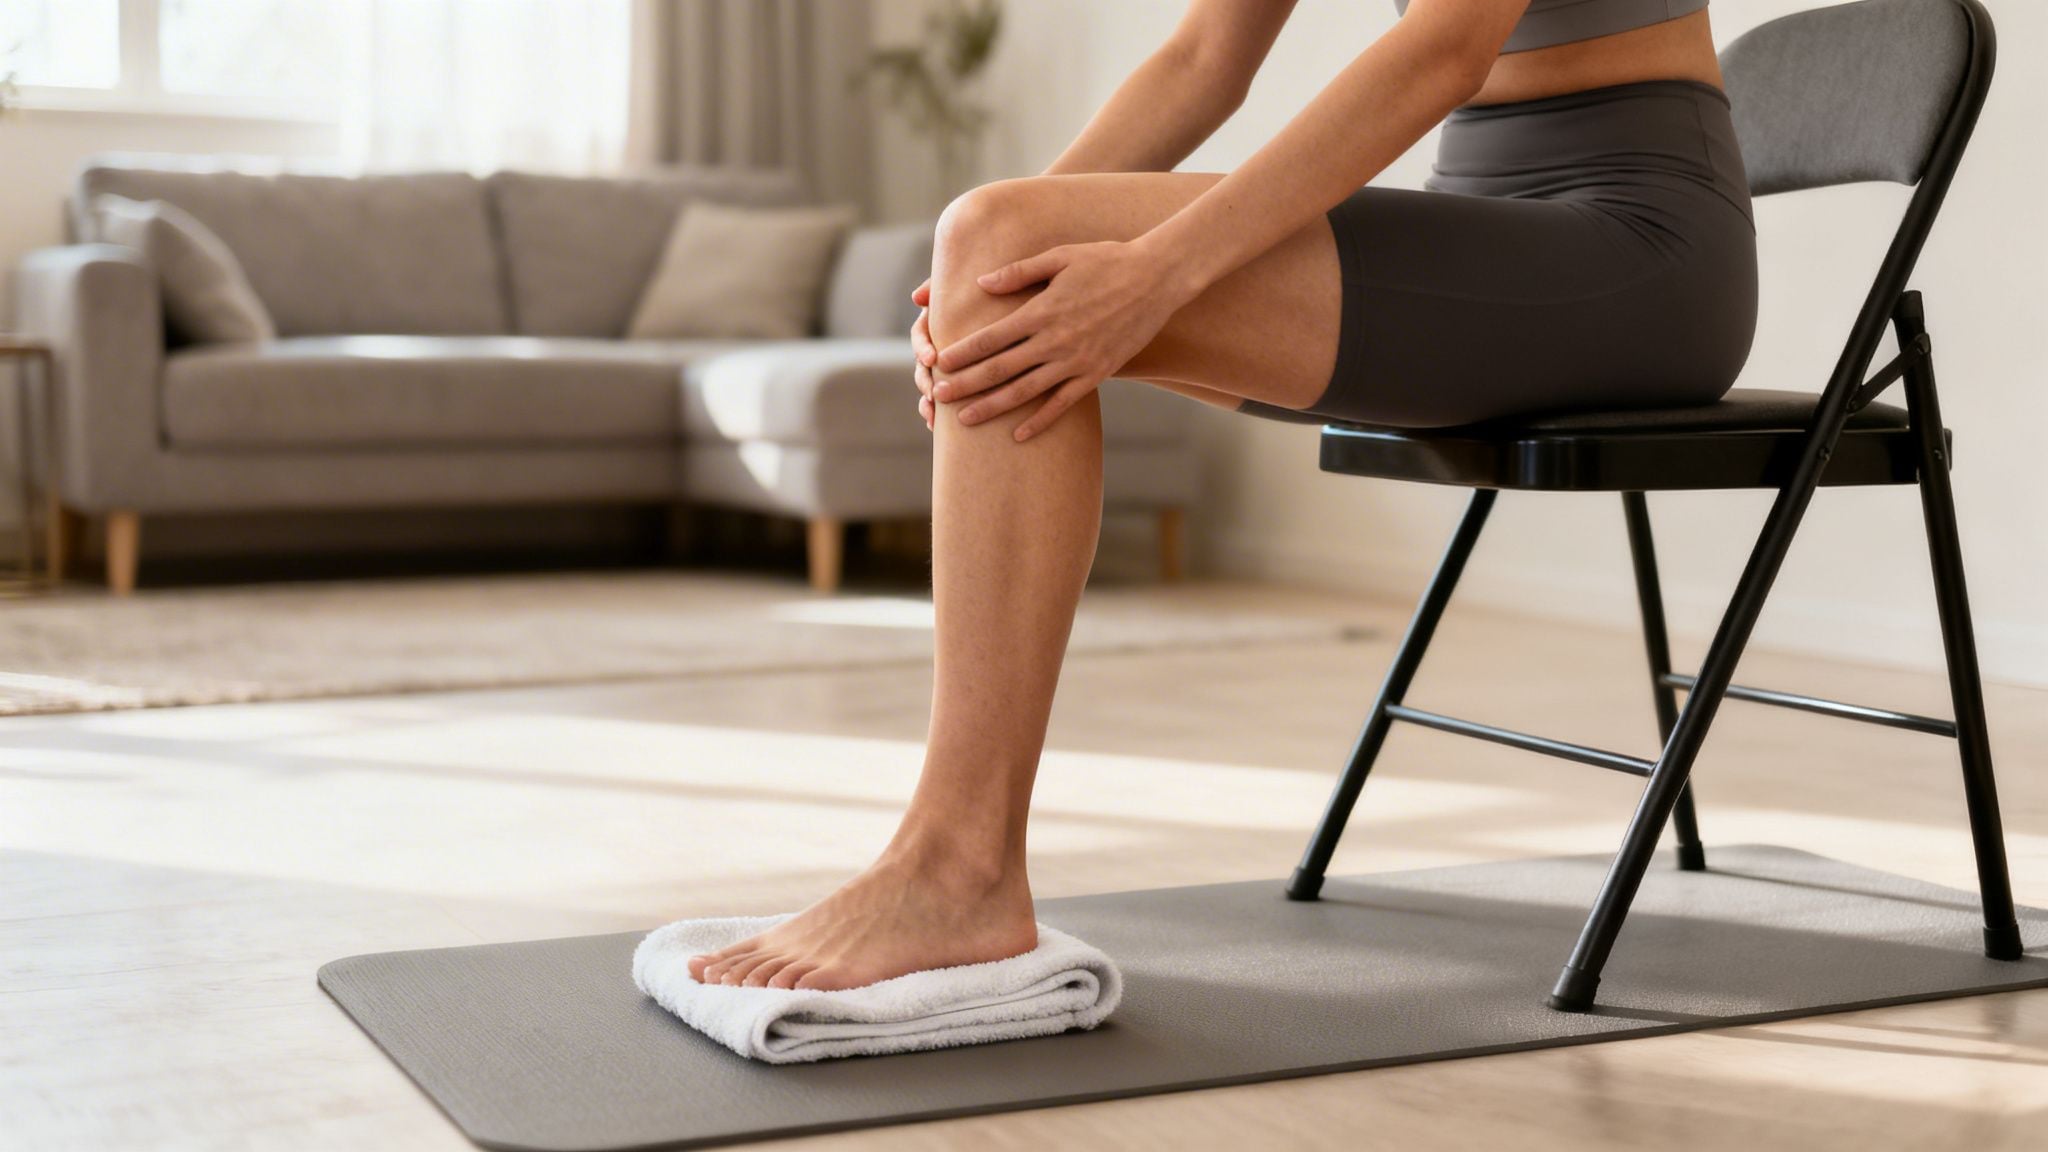
Why Gentle Motion Is Your Best Friend
It feels backward to move something that hurts, but I can tell you from experience that complete rest is often the enemy of a good recovery. When a joint stays locked up, scar tissue can build up, and your muscles start to "forget" their job. We call this muscle inhibition, and it's a major roadblock.
This is especially true for the quad muscle on the front of your thigh. It’s notorious for shutting down after a knee injury or surgery. Gentle, controlled exercises are the key to waking it back up.
Core Exercises For Early Recovery
These movements are the foundation of your comeback. They’re designed to be done multiple times a day, always within a comfortable, pain-free range. Your body will tell you what’s too much—if you feel a sharp, distinct pain, that’s your cue to stop.
Quad Sets (Quadriceps Isometrics)
This is the very first thing we do to reconnect your brain to your main knee-stabilizing muscle. It’s incredibly simple but profoundly important.
- Sit or lie down with your injured leg straight out. You can place a small, rolled-up towel under your knee for a little support and feedback.
- Without moving your leg at all, just tighten the big muscle on the front of your thigh (your quad). Think about pushing the back of your knee down into the floor or towel.
- Hold that contraction for 5-10 seconds, then let it go completely. You should see or feel your kneecap pull up toward your hip when you squeeze.
- The goal here is frequency. Aim for 10-15 reps every hour or two you're awake.
Heel Slides
This is your go-to exercise for regaining the ability to bend your knee (flexion).
- Lie on your back with both legs out straight.
- Slowly slide the heel of your injured leg up toward your hip, letting the knee bend as far as it comfortably will. Never force it.
- Hold for just a second or two at the top.
- Gently slide your heel back down until the leg is straight again.
- Perform 10-15 repetitions, focusing on a smooth, controlled motion.
A huge mistake we see is people trying to get all their motion back in one day. Your knee will feel stiff, then loosen as you move. The goal is to slowly chip away at that stiffness, not to shatter it with aggressive stretching.
Passive Knee Extension (Heel Props)
Getting your knee to straighten fully is just as critical as getting it to bend. Losing even a few degrees of extension can throw off your walking pattern for months.
- Sit on the floor or a firm couch.
- Prop your heel up on a rolled-up towel, a yoga block, or the edge of another chair. The key is to have your knee completely unsupported, just hanging in the air.
- Now, just let gravity do the work. Relax your leg and allow your knee to gently straighten for 5-10 minutes. For a little extra pull, you can place a light weight (like a 1-2 lb ankle weight) just above the kneecap if it’s comfortable.
- Do this several times throughout the day.
These early movements aren't just for show; they have a measurable impact. One large analysis confirmed that for patients recovering from total knee replacement, a structured exercise program significantly improved function and reduced pain within the first few months, whether it was done at home or in a clinic.
And remember, your knee is part of a team. The joints above and below—your hip and ankle—are crucial for its stability. A mobile, strong hip can take a tremendous amount of pressure off an angry knee. To learn more, check out our guide on how to improve hip mobility.
Phase 2: Building Foundational Strength and Stability
Okay, the initial swelling is down and you've started to get some basic movement back. That's a huge win. Now the real work begins. Phase 2 is where we pivot from simply protecting the knee to actively rebuilding the muscles that support it.
Think of this as laying the foundation for a stronger, more resilient knee. We're now focused on controlled, active strengthening for the entire support system—your quads, hamstrings, glutes, and even your calves. These muscles have to work as a team to absorb shock and control movement. Getting them strong again isn't just a suggestion; it's essential for a full recovery.
From Passive Motion to Active Strength
This phase is all about loading the healing tissues in a safe, progressive way. The exercises are still very controlled, but they will absolutely challenge you more than the gentle motions from Phase 1.
The "traffic light" rule is your best friend here. A little muscle burn or fatigue is a green light—that's good. But any sharp, distinct pain is a hard stop. That’s a red light. You have to listen to your body.
Here are the cornerstone exercises for this phase. Start with a manageable number of reps and sets, focusing entirely on perfect form. You only earn the right to progress when you can do them correctly and without significant discomfort.
Foundational Strengthening Exercises
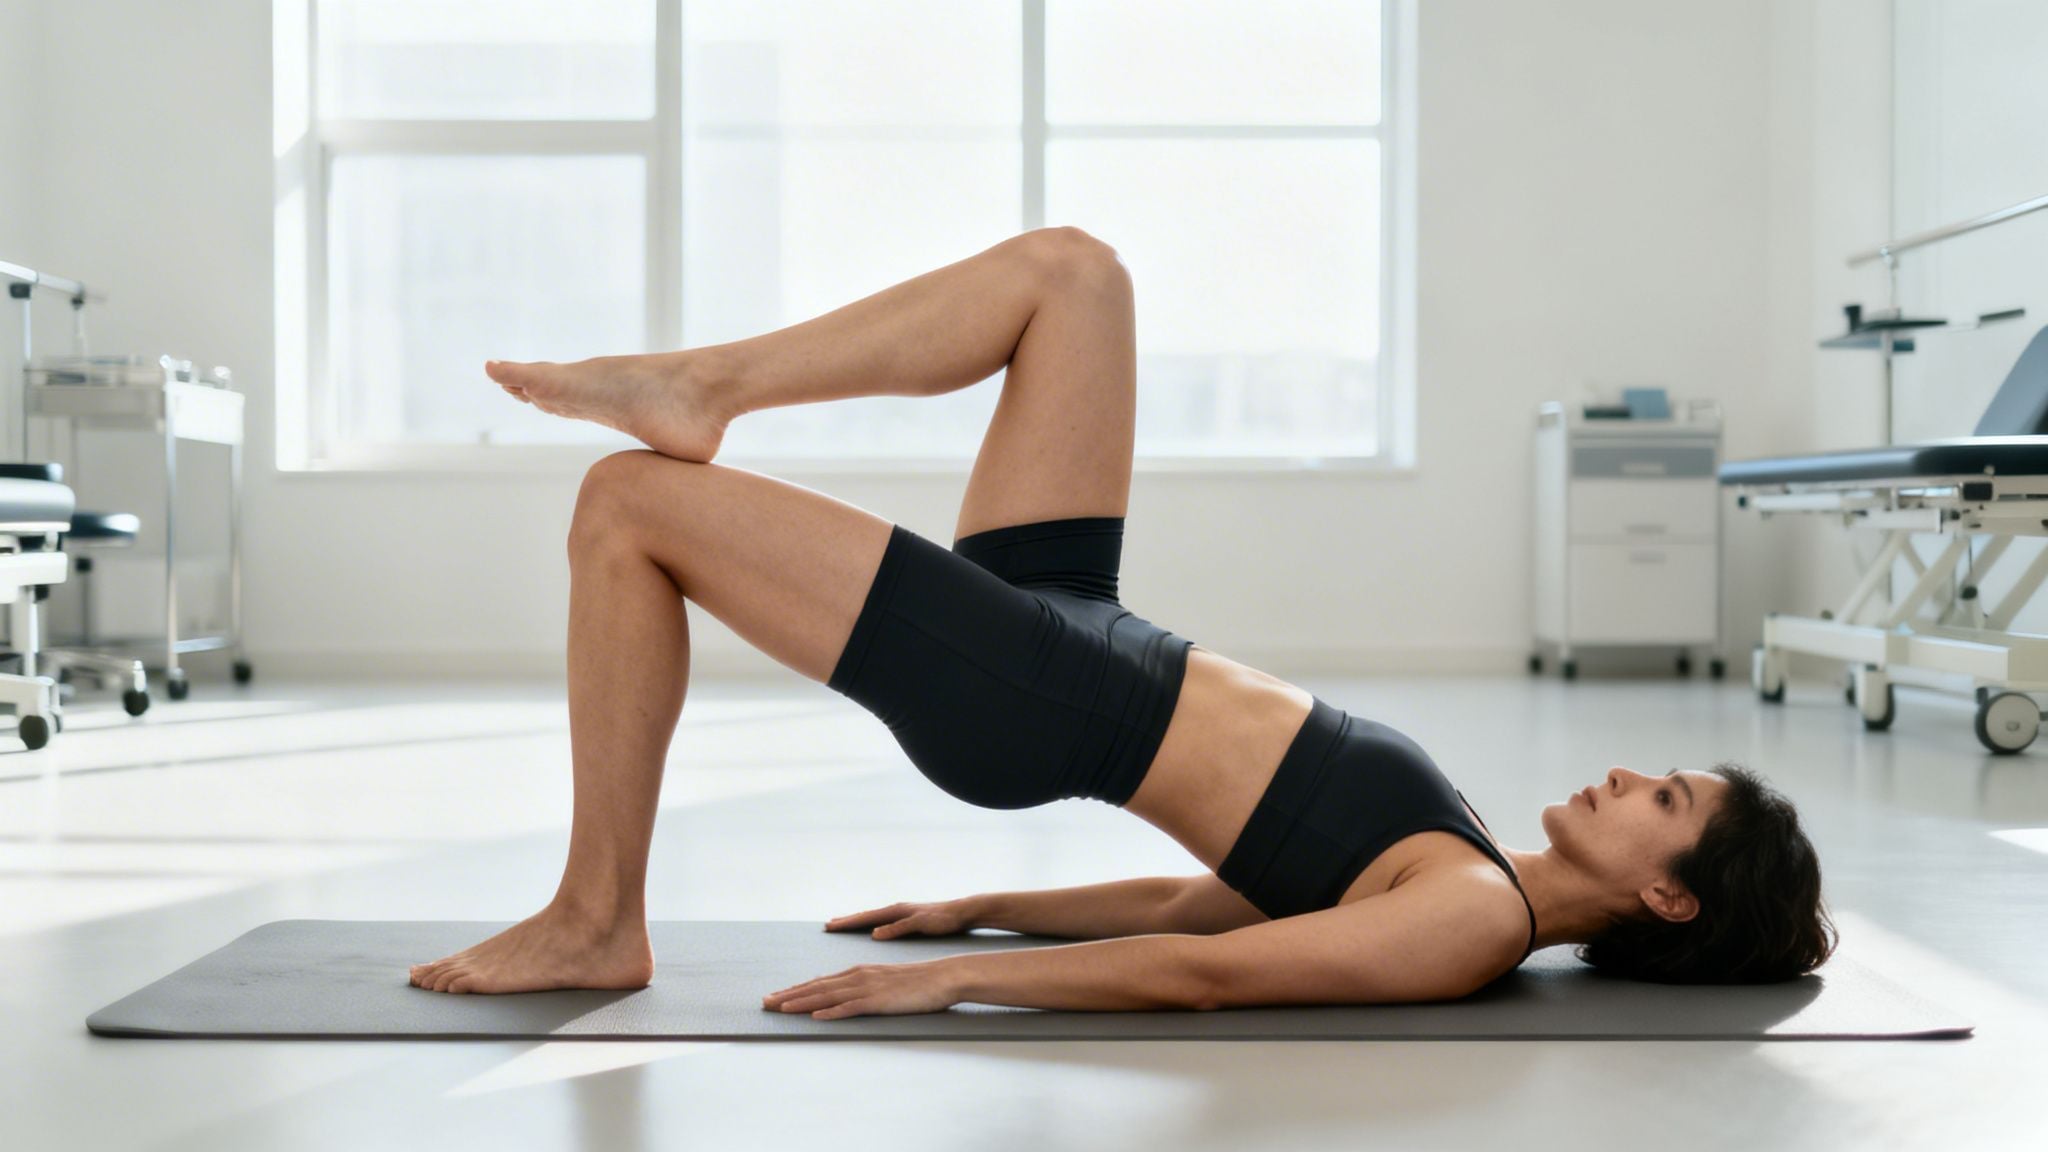
1. Glute Bridges
Your glutes are the powerhouse of your lower body. Building them up takes an incredible amount of pressure off your knee joint, which is exactly what we want. This is one of the first and best exercises for building that essential hip strength.
- Lie on your back, knees bent, feet flat on the floor about hip-width apart.
- Engage your core and squeeze your glutes to lift your hips. Your body should form a straight line from your shoulders to your knees.
- Hold at the top for a count of two. Make sure you feel the work in your glutes, not your lower back.
- Slowly lower back down.
- Aim to start with 2 sets of 10-15 reps.
Progression is key. Once two-legged bridges feel almost easy, you're ready for the next step. Try lifting one foot off the floor and performing a single-leg glute bridge. This dramatically increases the stability challenge.
2. Mini-Squats
The squat is a fundamental movement, but we have to reintroduce it carefully. Mini-squats are the perfect way to begin strengthening your quads and glutes in a functional, weight-bearing position without over-stressing the joint.
- Stand with your feet shoulder-width apart. You can do this in front of a chair or with your back against a wall for extra support and feedback.
- Slowly bend your knees and lower your hips just a few inches—think a 25-30 degree bend in your knees, nothing deeper.
- Keep your chest up and back straight. Critically, watch your knees and make sure they track over your second toe. Don't let them cave inward.
- Push through your heels to return to a standing position.
- Start with 2 sets of 10 reps.
Re-Training Your Knee's "Sixth Sense"
Strength is only one piece of the puzzle. We also have to retrain proprioception—your body's awareness of its position in space. An injury disrupts this "sixth sense," which can leave you feeling unstable or like your knee might "give way."
Improving proprioception is non-negotiable for preventing re-injury. We challenge it with simple balance exercises that force the small muscles around your knee to make constant, tiny adjustments to keep you stable.
- Single-Leg Stance: This is as simple as it sounds. Stand on your injured leg near a counter or wall for safety. Your goal is to hold your balance for 30 seconds. As that becomes easier, try it with your eyes closed or while standing on a pillow.
- Tandem Stance: Stand with the heel of one foot directly touching the toes of the other, as if on a tightrope. This narrows your base of support and challenges your balance differently. Hold for 30 seconds, then switch feet.
Phase 2 Strengthening Exercise Progression
This table lays out a clear path for the key strengthening exercises in this phase. The focus should always be on quality of movement. Don't rush to progress until you've truly mastered the current level.
| Exercise | Target Muscle | Starting Point (Sets x Reps) | How to Progress |
|---|---|---|---|
| Glute Bridge | Glutes, Hamstrings | 2 x 15 | Progress to single-leg bridges or add a resistance band around your knees. |
| Mini-Squat | Quads, Glutes | 2 x 10 | Gradually increase the depth of your squat or hold light dumbbells. |
| Standing Hamstring Curl | Hamstrings | 2 x 12 (each leg) | Add a light ankle weight or use a resistance band for a greater challenge. |
| Single-Leg Stance | Stabilizers, Nerves | 3 x 30 sec | Close your eyes, stand on an unstable surface (pillow), or add small movements. |
This phase can last for several weeks, and that's completely normal. You'll know you're on the right track when you can walk without a limp, handle stairs with more confidence, and complete these exercises without a spike in pain or swelling.
The foundational strength you build here is what sets you up for success in the next, more dynamic phase of your recovery. If you find yourself struggling with pain, unable to progress, or just unsure if you're doing things right, that's the perfect time to schedule a consultation with one of our physical therapists.
Phase 3: Advanced Strengthening and Return to Activity
You’ve put in the work, built a solid base of strength, and your knee is finally starting to feel reliable again. So what’s next?
This is where we shift from pure rehabilitation to performance training. We’re bridging the gap between feeling “okay” and getting you back to running, cutting, and playing your sport with confidence. Think of this as the final tune-up before you’re cleared for takeoff, whether that’s a weekend soccer game or just chasing your kids around the park without a second thought.
A Bulletproof Knee Needs a Strong Support System
Here’s something we see all the time in the clinic: a resilient knee is rarely just about the knee itself. It’s about building strength up and down the entire kinetic chain.
A strong core and powerful hips act as your knee’s best defense system. They absorb impact and control your alignment, so the knee joint doesn't take the full brunt of every step, jump, or landing. While we'll keep strengthening your quads and hamstrings, the real focus now shifts to your glutes and trunk. This is non-negotiable for long-term knee health.
Advanced Exercises for Real-World Demands
These next exercises are more dynamic and challenging. Form is everything. Remember our "traffic light" rule: muscle fatigue and burn are green lights, but sharp, distinct pain is a red light. Stop, reassess, and never sacrifice the quality of the movement just to hit a certain number of reps.
Forward and Reverse Lunges
Lunges are incredible because they mimic the single-leg strength and balance needed for almost everything we do—walking, running, and climbing stairs.
- Start standing tall with your feet together.
- Take a big, controlled step forward, lowering your hips until both knees hit about a 90-degree angle. Your front knee should stay stacked over your ankle, not shooting out past your toes.
- Powerfully push off that front foot to drive yourself back to the starting position.
- For a variation that's often a bit friendlier on the knee joint, try reverse lunges by stepping backward instead.
- Aim for 2-3 sets of 8-12 reps per leg. Focus on smooth, stable movement.
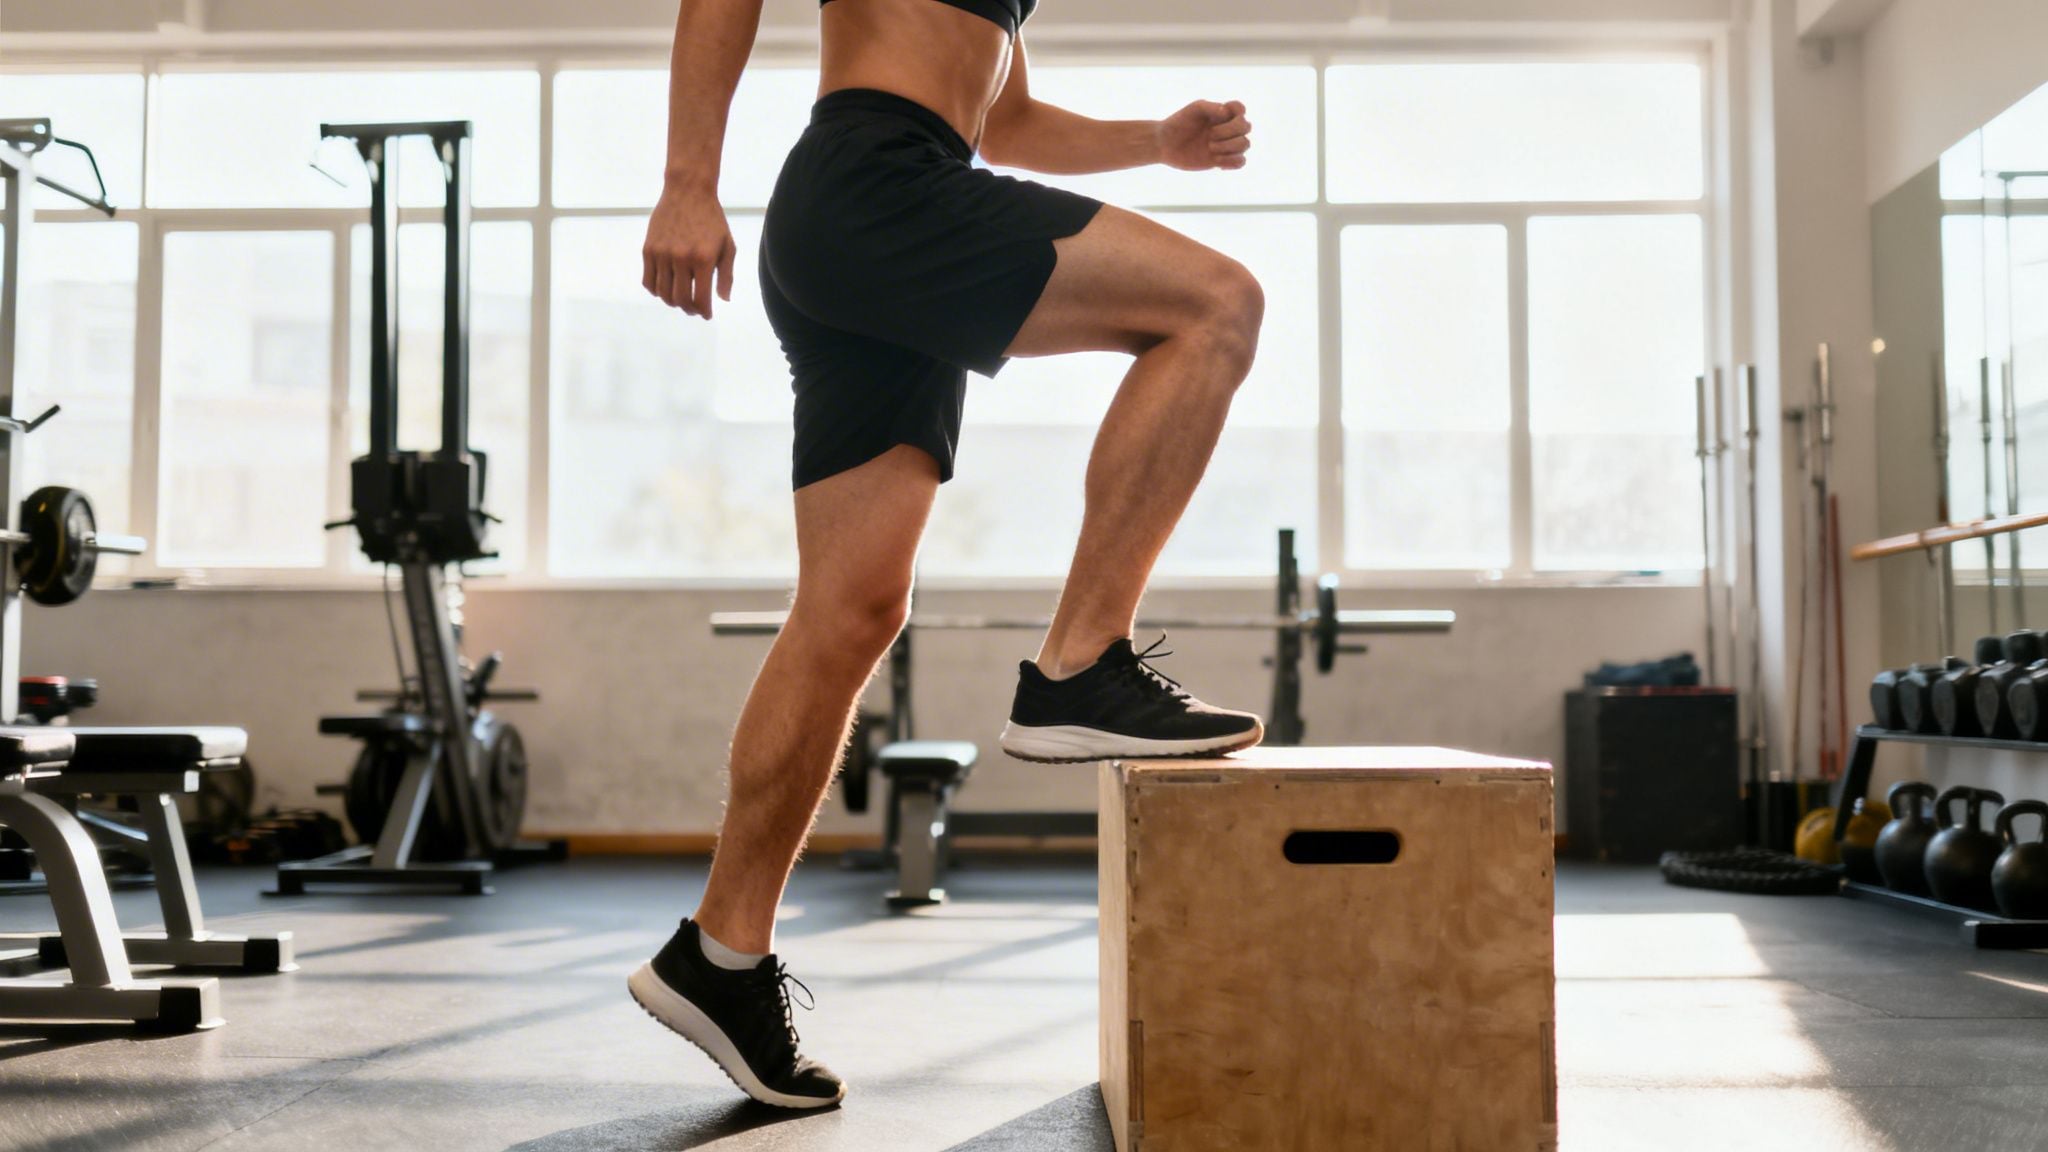
Step-Ups
This is a classic for building single-leg power in the glutes and quads. It directly translates to climbing and explosive movements.
- Find a sturdy box or step. Start low—around 6-8 inches is plenty.
- Plant your entire right foot firmly on the box.
- Drive through your right heel to lift your body straight up. Bring your left foot to meet the right on top of the box.
- Slowly step back down with the left foot, followed by the right.
- Finish all reps on one leg before switching. Try for 2-3 sets of 10-15 reps per leg.
The biggest mistake we see with step-ups is people pushing off their back leg. The work should come entirely from the leg that's on the box. Focus on driving that heel into the step to lift yourself.
Introduction to Plyometrics: Box Jumps
If you play a sport that involves jumping or quick changes of direction, plyometrics are essential. They teach your muscles not just to produce force quickly, but—more importantly—to absorb it safely. We always start small and focus on perfect mechanics.
- Stand in front of a low, sturdy box (6-12 inches to start).
- Dip into a mini-squat, swing your arms back, and then explode upward, using your arms for momentum.
- Land softly on the box—think "quiet as a cat." Absorb the force by bending your knees and hips.
- Step down, don't jump down. Reset your feet and repeat.
- Start with just 2-3 sets of 5-8 reps. This is about quality and explosiveness, not cardio.
Tying It All Together with Smarter Training
This phase is about more than just a list of exercises; it's about re-teaching your body how to move as an integrated system.
This isn't just a hunch—it's backed by solid research. A massive review looking at over 28,000 young athletes found that structured training programs combining neuromuscular control, core work, and balance drills can slash the risk of lower extremity injuries by 25%. The best results often came from short sessions of 5-15 minutes, performed several times a week as part of a dynamic warm-up.
These are the exact principles we build our athletic programs around. You can see how we put this science into practice in our Joint Ventures ACL Prevention Program.
By committing to this level of training, you aren't just finishing your recovery. You're building a more durable, resilient body that's better protected against future injuries. This is the final push to get you back to 100%.
Knowing When to Get Professional Guidance
Following a structured exercise plan is a great way to take charge of your knee recovery. But even the best online guide has one major limitation—it can't see what's happening with your specific knee.
Think of it this way: a car manual is useful, but it can’t listen to your engine, diagnose the weird clunking noise, and tell you exactly which part needs to be fixed. For that, you need a skilled mechanic. A physical therapist is that skilled mechanic for your body.
A DIY approach can work wonders for minor aches, but certain signals are your body’s way of saying it’s time to call in a professional. Listening is one of the smartest things you can do for your long-term health.
Red Flags You Shouldn't Ignore
We tell our patients all the time: your body is an excellent communicator. You just have to learn its language. If your knee is sending up any of these “red flags,” it’s time to pause what you’re doing and get a professional opinion.
- Sharp, Stabbing Pain: Muscle soreness or a dull ache after exercise is normal. Sharp, unrelenting pain that doesn't go away with rest is a major warning sign.
- Significant Swelling: Some minor swelling is expected with an injury. But if your knee balloons up, or if swelling gets worse instead of better with ice and elevation, that’s a concern.
- A Feeling of Instability: If your knee feels like it’s going to buckle, give way, or "shift out of place" during simple activities, that’s a clear sign of joint instability that needs to be addressed.
- A Plateau in Your Progress: Have you been diligent with your exercises for several weeks but aren't seeing any real improvement in your pain, range of motion, or strength? You've likely hit a wall that a generic program can't solve.
Ignoring these symptoms is like driving with your check engine light flashing. You might get a little further down the road, but you risk turning a small issue into a major breakdown.
The goal of a good recovery isn't just getting back to where you were. It's about building a stronger, more resilient knee. A physical therapist is your partner in fixing the root cause, not just patching the problem.
What a Physical Therapist Can Do For You
Coming in for an evaluation can feel like a big step, but our job isn’t to judge what you've been doing on your own. It's to listen to your story, figure out exactly what’s going on, and build a plan that gets you back to your goals.
For a comprehensive recovery, seeking expert advice is crucial. You might consider professional services such as Physical Therapy Fitness Rehabilitation services that align with a hands-on, personalized approach.
Here’s what you can expect when you see one of our PTs:
- A Precise Diagnosis: We use hands-on tests to pinpoint the exact source of your pain. Is it really a meniscus issue, or is it patellofemoral pain syndrome? A correct diagnosis is the foundation for any effective treatment plan.
- A Truly Custom Plan: We’ll design a program specific to your body, your injury, and your life. Your plan will look very different if you want to run the Boston Marathon versus just wanting to walk your dog around the Public Garden without pain.
- Advanced Techniques: Our toolbox contains more than just exercises. We can use manual therapy to improve joint mobility, trigger point dry needling to release stubborn muscle knots, and other specialized techniques to help accelerate your healing.
A knee injury can completely sideline your active life. One study found that physical activity levels can plummet by as much as 50% six months after an injury. Guided rehab is the key to countering that trend and getting you back to pre-injury fitness.
If you’re ready to get a clear answer and a path forward, we’ve put together a guide on how to prepare for your first physical therapy appointment to make the process as smooth as possible.
Remember, asking for help isn’t a sign of weakness—it’s the fastest way to get back to doing what you love.
Common Questions About Knee Injury Recovery
In the clinic, we get asked the same questions every day about knee recovery. Having clear, honest answers can give you some much-needed peace of mind and help you stick with the plan. Let's tackle them head-on.
How Long Will My Knee Injury Take to Heal?
Honestly, there’s no single answer—it completely depends on the injury and the person. A minor muscle strain might feel worlds better in a few weeks. A full ACL reconstruction, on the other hand, can take 9 to 12 months before an athlete is cleared for a full return to their sport.
The biggest factors are the specific injury you’re dealing with, your fitness level before you got hurt, and how consistently you attack your rehab. The phases in this guide give you a general roadmap, but your body always sets the pace.
The number one cause of setbacks we see is people pushing too hard, too fast. Your goal should be steady progress, not a race to the finish line. A physical therapist can give you a much more accurate and personalized timeline after a full evaluation.
Is It Okay to Exercise with Some Knee Pain?
This is a fantastic question. The key is learning the difference between productive discomfort and damaging pain. A dull ache from a muscle that's working hard and getting stronger is very different from a sharp, stabbing pain inside the joint itself.
We teach our patients to use the "traffic light" rule:
- Green Light: Mild discomfort, maybe a 1-3 out of 10 on the pain scale, that doesn't get worse as you exercise. This is usually just the feeling of your muscles working. You’re good to go.
- Yellow Light: Moderate pain, a 4-6 out of 10, that makes you hesitate or change how you move. This is a warning sign. It's time to stop, modify the exercise, or choose a different one.
- Red Light: Any sharp, severe, or increasing pain—a 7 or higher—is an immediate stop. Pushing through this kind of pain is how you can set your recovery back and cause more damage.
Should I Use Ice or Heat for My Knee?
A great rule of thumb we use in the clinic is: ice for injuries, heat for muscles.
For the first 48-72 hours after a new injury, or anytime you have noticeable swelling, go with ice. Use it for 15-20 minutes at a time. Icing helps constrict blood vessels, which is exactly what you want to reduce inflammation and numb the area.
Heat is best for chronic stiffness or sore muscles before you exercise. Applying heat increases blood flow, which helps relax tight tissues and get them ready for movement. Just be sure to never apply heat to a fresh, swollen injury—it will only make the inflammation worse. When in doubt, start with ice.
Do I Really Need to Wear a Knee Brace?
Braces can be helpful tools, but they’re almost never a permanent fix. In the early stages, a simple compression sleeve can be great for managing swelling and giving you a sense of support and security.
More rigid, hinged braces are typically reserved for significant instability or post-surgical recovery. These should always be fitted and prescribed by a professional.
But the real goal of good physical therapy is to make your muscles so strong, your balance so dialed-in, and your movement patterns so efficient that you don’t need a brace. Think of it as a temporary aid, not a lifelong solution. Your own strength is the best brace you can have.
At Joint Ventures Physical Therapy, our entire mission is to be your partner in recovery, giving you the expert guidance and one-on-one care you need to move past your injury and get back to the life you love. If you're tired of guessing and want a clear, personalized plan, schedule your appointment with us today.